Thursday, November 14, 2013

Mini Pizzas and Bread Loaf


The other day we were seriously craving pizza. Since payday was still a few days away, I found myself making up a batch from the very versatile Bread Dough and Focaccia recipe. It is very simple to make and you'll wind up saving yourself a bunch of dough (pun intended) that you would normally spend on take-out. 

Quick and Easy Mini Pizzas and Bread Loaf

Yield: 16 minis plus 1 loaf of bread

Tomato Sauce (your favorite jar or homemade)
Shredded Mozzarella Cheese
Pecorino Romano
Italian Seasoning
Olive Oil
Kosher Salt
Freshly Ground Pepper
1/4 Stick Melted Butter

Note: See Bread dough recipe for more in depth instructions. 

When the bowl of dough is completely risen, set aside one quarter and place into a greased loaf pan. Cover with a kitchen towel and let sit in a warm area until it doubles in size (at least an hour). Uncover and make a slice down the center with a sharp knife and brush with melted butter.

Bake until internal temperature reaches 200 degrees. Remove from pan to cool.

Using remainder of dough, divide into sixteen pieces. Flatten into round disks. Drizzle olive oil generously onto cookies sheets. Place four discs at a time on each cookie sheet. Ladle with tomato sauce, add cheeses, Italian seasoning, salt, pepper & a drizzle of olive oil. I also like to brush the edges of the pizzas with a little extra olive oil so they will bake up nice and golden brown. If you wish, this would be a good time to add on your favorite toppings like fresh veggies, dollops of ricotta, fresh mozzarella slices, pepperoni, fresh basil leaves and so on. The possibilities are endless! 


Bake in 400 degree preheated oven on bottom rack. Use a spatula to peek under the pizzas to check on the bottom crust. Once bottom crusts are nicely browned, move pan onto upper rack until cheeses are melted, bubbly and golden brown. Enjoy!


Tuesday, October 29, 2013

Bread Dough and Focaccia


There's nothing better on a fall afternoon than a slice of homemade bread slathered in butter. I remember in my childhood, my mother would get up real early on the weekends, and let me help her gather the ingredients together to bake up some crusty luscious bread. As we waited for it to bake, the fragrant aroma of sumptuous loaves would waft up through the air and assault our senses with the warm fuzzies. She would tell me stories of how she and her mommy, Mama Connie, would bake bread as well. Her mother would drizzle olive oil on the warm bread and top it off with some crushed oregano. Her mother used to serve the bread with a side of Sicilian orange salad which was basically an orange sectioned off into a bowl drizzled with olive oil, crushed oregano and sprinkled with Kosher salt. The combination of sweet and salty was divine. I know this because my mom would make it for me and now I make it for my children. Don't knock it until you give it a taste. 

Today, I thought I'd share two recipes. This bread dough recipe makes enough dough to bake up two loaves of bread as well as two 12 inch round pans of focaccia bread. Oh and feel free though to serve the orange salad on the side. Hope these recipes are as comforting to you as they are to me and my family. Enjoy!


Bread Dough
Scant tablespoon yeast
1 1/2 cups milk
1 cup boiling water 
1/2 stick butter cut into slices
3 tbsp sugar
3 tbsp olive oil
1 1/2 tsp. kosher salt
2 cups cake flour
1 cup sprouted whole wheat flour (or your favorite whole grain flour)
6 cups A.P. flour
1 egg (beaten)


I use a KitchenAid mixer with the dough hook attachment. My mixer happens to be a hand-me-down from my mom. If you do not happen to own one of those beauties, this recipe can be done by hand. Just throw all the ingredients into the largest bowl you have on hand. 

The only tricky part of this recipe is to try not to kill the yeast. Make sure to mix the hot water and milk until the mixture is luke warm. 

I use the baby bottle method -- don't laugh yet... it works every time.
Simply sprinkle a few drops of the milk/boiling water mixture on the inside of your wrist. If it doesn't burn you, it's perfect!

If you happen to have a food thermometer... 95 degrees works even better. 

You may set aside any leftover liquid for later. Once you've established the correct temperature, add the butter slices and sugar. Stir until you notice the yeast is completely dissolved and the butter has melted. Let sit so the yeast can colonize or multiply, approx. 10 minutes. 

Begin adding the cake flour and the sprouted wheat flour. Mix until incorporated. Next, add A.P. flour (one cup at a time). Add any remaining milk/boiled water little by little as needed until dough becomes smooth. If dough is too sticky, add more flour. If dough is too dry, add more liquid. You may end up with a half cup of leftover flour in which you may use during the kneading process. 


When you see the dough begin to come together and separate from the mixing bowl it is ready to knead. 

Let gravity do the work for you by turning bowl over onto lightly floured surface. By using the heals of your hands, press dough, turn dough about 45 degrees, fold over, and knead again. Knead for probably a good ten minutes. 


Cover with plastic wrap that has been sprayed with non-stick spray. Place a kitchen towel over the bowl and let sit in the warmest place of your home. 

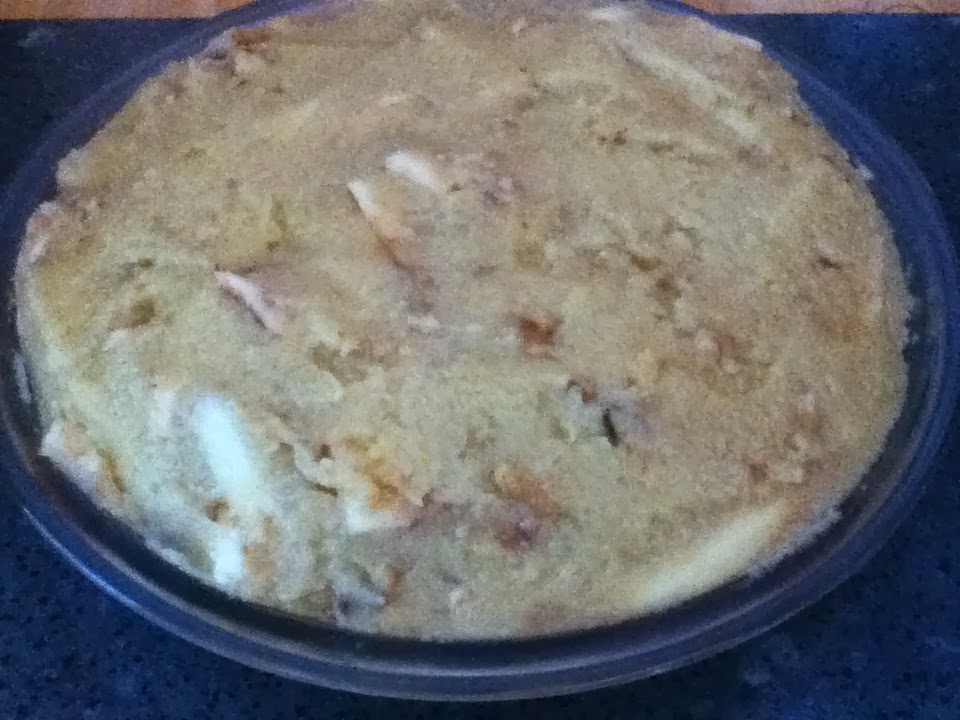
When dough is doubled, usually 1 to 2 hours... separate into thirds. Set aside 1/3 for later. Punch down the rest and divide into two loaf shapes and place each one into well greased 9" X 5" loaf pans. 

Cover again with the same plastic wrap you used before (if you wish to conserve), place the towel over the loaf pans and let sit once again until dough doubles or triples in size and takes up the entire pan. 

Preheat oven to 450 degrees

Brush the beaten egg over the top of each pan of bread dough. If you wish, you could sprinkle on some sesame or poppy seeds. 

Poppies! Poppies!

Anyway, place loaf pans in preheated oven and bake at 450 degrees for the first five minutes.


After five minutes, lower the oven to 375 degrees. Bake until bread is golden brown with an internal temperature of approximately 200 degrees. My mom taught me her traditional way of knowing how the bread loaf was done. I did it her way for years before I owned a food thermometer. I guess I was too lazy to purchase one at the time. Ha! Anyway, I remember she would tell me to remove the loaf of bread out of the pan and knock on the underside a few times. If it sounded  hollow, it was done. However, I definitely prefer the high tech food thermometer method to check for doneness.

Sometimes, during last few minutes of baking time I remove the bread from the pans and place directly on the oven racks. This enables the loaves to be golden brown all over. 

If you haven't already removed the loaves from the pans, do so after taking them out of the oven. Place bread on cooling racks. Try to refrain from cutting off a slice for at least 15 minutes. It ensures the hot dough won't lay in your belly and cause a bellyache. Well, that's what Mama Connie and my mother used to say anyway. LOL.


If the aroma hasn't driven your smell-buds crazy by now, dig in by carefully slicing with a serrated bread knife using a gentle sawing motion. 

Some serving suggestions: 

Top with your favorite things in life... like butter, olive oil, herbs, cream cheese, goat cheese, jams etc. Also, this bread is perfect for dipping into a small bowl of olive oil with roasted garlic, herbs, and grated cheese. Oh and the next day it is wonderful as a toasting bread or even great with sandwiches... like grilled cheese. It's wonderful for a panini as well! 


********************************


Focaccia
3 scallions (cut on the diagonal into thin strips)
Tuscan and Italian Seasoning (or your favorite spices)
2 cups grated mozzarella cheese
1 cup Pecorino Romano cheese (my favorite is Locatelli)
extra virgin olive oil

Divide above ingredients in two.

Use remaining third of the dough to form two equal 4 inch round ball shapes. Place ball shapes on 12 inch pizza pans that have been well-oiled. Flatten out with your hands. Work the dough out to the edges of the pan, trying to be patient because it has a tendency to snap back. When the gluten relaxes, it will eventually stay put. 


Drizzle olive oil over flattened out dough. Add cheeses, scallion slices, and spices. Bake at 400 degrees on the bottom rack until the bottom of the crust is golden brown, then move up to the top shelf and bake until top is golden. 


Note: I often use a rounded piece of foil to prevent toppings from burning while I'm waiting for bottom crust to brown. 

When cooked, transfer to a cooling rack. After a few moments, you can move it onto a cutting board and slice into rectangles. 


Monday, October 21, 2013

Stuffed Shells and Lasagna Roll-Ups


I mentioned in a previous blog about not having a kitchen sink. Well, the truth is, not only do I not have a kitchen sink, I can't even run two appliances at the same time. As you can imagine, this makes preparing complex, multi-step recipes a little tricky. Preheating my countertop oven and prepping ingredients at the same time isn't even an option. However, over the years I've learned you can accomplish just about anything as long as you have some creativity and a sense of humor.

Scouring the bathroom sink on a regular basis helps, too.


Today, I'm going to share two recipes that may look a little intimidating to cook one appliance at a time, but with a little patience, there's no reason it can't be done. If Paula Louise Cooks without a kitchen, so can you!


Stuffed Shells

1 lb box of jumbo shells
2 cups ricotta
1 egg (beaten)
2 cups mozzarella cheese (1/2 cup in reserve for topping)
1 cup of your favorite freshly grated cheese (1/2 cup in reserve for topping)
salt and pepper 
2 cups tomato sauce
drizzle of extra-virgin olive oil
Italian Seasoning (pinch or two)
Non-stick cooking spray


Preheat oven to 350 degrees 

Cook pasta shells according to package directions (or a few minutes less because they will bake further in the oven). Set aside on a sheet pan to cool. 

In a large bowl, add ricotta, egg, cheeses, and a sprinkling of salt and freshly ground black pepper. Stir until combined.


TO ASSEMBLE:
Spray a casserole dish with non-stick cooking spray. Drizzle about a 1/4 cup of water into the casserole dish and then add a ladle full of tomato sauce (about 1/2 cup). Swirl dish until the sauce/water is equally distributed on the bottom. This is to help prevent the food from sticking or burning.

While holding a shell open with one hand, scoop in a heaping tablespoon of the cheese mixture and gently squeeze the shell until partially closed. Place in the casserole dish. 


After dish is full of stuffed shells, drizzle the remainder of tomato sauce over the top. Sprinkle both reserved cheeses over entire casserole. Drizzle with olive oil and crush the Italian seasoning over top. 


Cover with foil that has been sprayed with non-stick spray and secure tightly.  Bake for 1 hour. During last 10 minutes of cooking, remove the foil so the cheese will brown. 


********************************


Lasagna Roll-Ups

1 lb lasagna noodles (You could use whole wheat or multi-grain, if desired.)
2 lbs ground sirloin
1 medium onion, diced
4 garlic cloves, minced
1 tbsp extra virgin olive oil
1 16oz bag fresh baby spinach, washed 
1 egg, beaten
2 cups ricotta
1/2 cup garlic flavored croutons or more if you like the intense garlic flavor the croutons have to offer (crushed in a zip top bag with a rolling pin) or 3/4 cup fresh bread crumbs of your choice (save 1/4 cup in reserve to add as a topping with reserved cheeses -- optional)
3/4 cup shredded cheddar cheese (save 1/4 cup in reserve)
3/4 cup shredded mozzarella cheese (save 1/4 cup in reserve)
1/2 cup freshly grated Pecorino Romano or Parmesano Reggiano cheese
2 cups tomato sauce

On your hotplate or stovetop, cook and drain pasta noodles until al dente. Set noodles aside on a dish or cookie sheet to cool. Meanwhile, prepare the filling by sautéing the onion and garlic in olive oil until transparent. Remove from pan and place in a bowl. Next, brown the ground sirloin in same pan, drain. Lower the heat and add the baby spinach. Cook while covered until the spinach is wilted. Place sautéed onion and garlic back into the pan, add ricotta, shredded and grated cheeses (if you are a cheese lover -- feel free to add as much as you like), bread crumbs, and the egg. Stir until well combined.


TO ASSEMBLE:
Spray a casserole dish with non-stick cooking spray. Drizzle about a 1/4 cup of water into the casserole dish and then add a ladle full of tomato sauce (about 1/2 cup). Swirl dish until the sauce/water is equally distributed on the bottom. This is to help prevent the food from sticking or burning.


Cut the lasagna noodles in half as shown above. Line up the noodles on a sheet of wax paper. Place about an ice-cream scoop's worth of filling on one end of the lasagna noodle and begin rolling up. Place each roll-up in the casserole dish, seam side down. Once the dish is full, spoon tomato sauce over the top and sprinkle with reserved cheeses and optional reserved bread crumbs. The bread crumbs add a touch of crunchiness. It's entirely your choice to add them or not. I take turns with that option. If you choose to add them... I would toss them in small bowl with a little drizzle of olive oil before sprinkling them on. This gives the crumbs some extra flavor. Remember, there are no rules. You are your own boss. Be creative, don't be afraid to tweak the ingredients and make the recipe your own.


Spray a sheet of aluminum foil with non-stick spray, cover and bake in toaster, convection or traditional oven at 350 degrees F until the center is bubbly and the roll-ups puff up a bit. 

During last 10 minutes of cooking, remove the foil so the cheese will brown. 

Friday, October 4, 2013

Swiss Apple Pie

A few weeks ago while at a physical therapy appointment for an annoying bout of tennis elbow, my wonderful therapist friend Alex handed me the below recipe for Swiss Apple Pie. My first response was, "Swiss Apple Pie! What do they do -- add Swiss cheese to it?" I've often heard of apple pie with cheddar cheese, which I've unfortunately never tried (I LOVE cheese but that's beside the point!). Anyway, I took a second glance at the recipe Alex handed me and giggled, realizing of course there was no actual Swiss cheese in it, baked on it, or on the side of it. Silly ol' me. 

So, Alex went on to tell me that someone shared the recipe with him and that he was planning on making it this year for Thanksgiving. I asked him for the name of the person who gave it to him so I could give her credit for it. He told me her name was Shelly (unfortunately, I forget her last name). She breaks the recipe down into 4 super duper easy steps. Shelly - amazing recipe... thank you!

Anyway, I baked it up this week and I must say it is the most flavorful pie I think I've ever made. As a matter of fact, I would not hesitate to also make this for Thanksgiving, or any holiday for that matter. 

A big THANK YOU goes out there to Alex for the recipe and for taking such good care of me during my stint at physical therapy! I'm very grateful to him and the whole staff. You guys ROCK!


Swiss Apple Pie

1) Preheat oven to 350 degrees

Peel and cut 5 apples and place in pie dish


2) Sprinkle apples with:

1 tbsp cinnamon
1 tbsp sugar


3) Combine:

1 1/2 sticks melted butter
1 cup flour
1 cup sugar
1 egg
1/2 cup nuts (I used chopped walnuts, but I'm sure you could switch out your favorite variety)


4) Pour over apples & bake for 1 hour


********************************

Note: The batter will have a thick consistency. While testing this recipe, I found I needed to add a lil' extra melted butter. I used an offset spatula to smooth batter over apples (see above photo). Also, it would be a good idea to place the pie on a baking sheet.

Serve with vanilla ice cream or whipped cream (or both!). 

Enjoy!